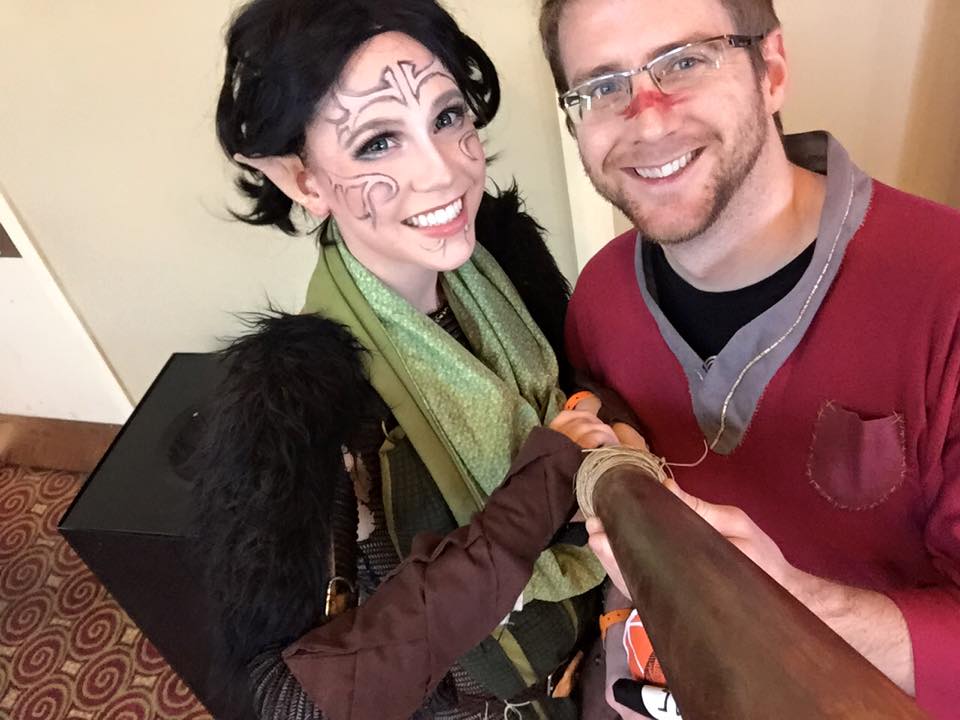
The Making of Merrill
A Dragon Age 2 Costume
by Molly Lankford
After I played the Dragon Age games, and I mean all of them, I decided that I needed to make at least one of these characters my character. I decided on Merrill because I actually like Dragon Age II the most (I know, I know, I’m the minority) and I like the vibe that the Dalish have.
I had never made a cosplay before so I had to separate the costume into pieces: it helped to dwarf the daunting task of getting everything right. And I’m really neurotic. So it began as a terribly stressful endeavor.
The Tabard
I went to Joann’s Fabric (which now knowing that most Walmarts carry the same fabric at a fourth of the price, I will probably never go again), and picked up some green, earthy, elfie fabric. I wanted a woodland texture to the fabric because I like to think that at least the wear and tear would give it texture. I also like to think that texture adds to the realism.
As you can see, I used the draping method on a dress form to get the shape I wanted. It was tricky to get the perfect amount of side showing without being too scantily clad. Also, if you notice I made the light green stripes actual panels and I have no idea why I did this. I’ve seen people just sew ribbons on top and it looks great. That would have been so much easier!
The rings used for the shoulder straps were also purchased from Joann’s and since you don’t have to wait on the customer service like you have to for the fabric, I was much happier. I bought a few sets of these rings because they were also going to be used in the shin covers/shoes.
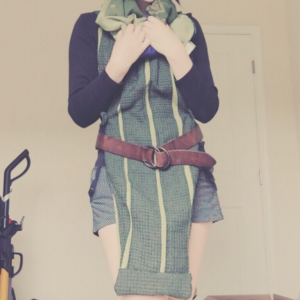
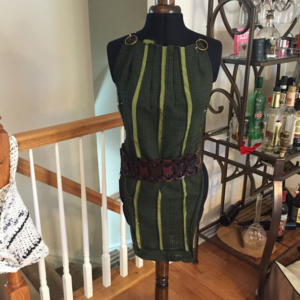
While Merrill’s tabard fastens with some lacing, I fastened mine with a strap and a button on both sides because this was easier to get in and out of without help.
The Fuzzy Pauldrons
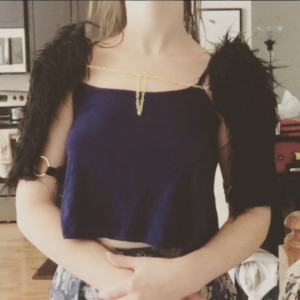
I needed a sturdy base for the pauldrons so they would keep their shape under all the fluff. Whilst wandering through A.C. Moore, I discovered the beauty of the embroidery grid. Since discovering this, I have used them for a ton of things. They’re a flexible but strong plastic that can be sewn through and shaped with heat. It’s perfection.
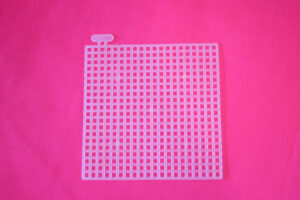
I cut out a shape for my arm and shoulder, which ended up looking sort of like a deformed mushroom (or the main part of the palace in Aladdin). In the circular part of the cutout, I cut through to about the middle of the circle and overlapped the pieces until it was a shape that hugged my shoulder.
After that, I covered them in fun fur (which I found at A.C. Moore) and lined the inside in a woodsy brown (so the embroidery grid didn’t poke me in the arm). I added some elastic around the arm section, and added a chain to keep the shoulder pieces together.
Dalish Arms and Dalish Legs
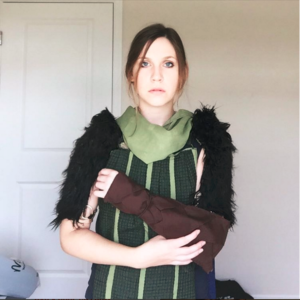
The vambraces and “shoes” were probably the trickiest part and because they’re so ugly in the process, I don’t have many WIP photos of them. It was horrible.
I traced out the general shape of my arms and my legs and then sewed a three-inch-wide band that stretched out into eternity so I could get that Dalish weave going. Don’t get me wrong, it’s a beautiful thing. But it’s a horrible, time-consuming, tedious, beautiful thing. I suggest planning out the weave on paper before cutting the pieces.
I then attached snaps at the wrist and straps at the thumb and arm to keep the vambraces on. The elastic on the leg pieces keeps them up for the most part, but I did end up using twine because walking everywhere all day did make them slip a bit. I will most likely end up attaching the leg pieces to the bodysuit in the future.
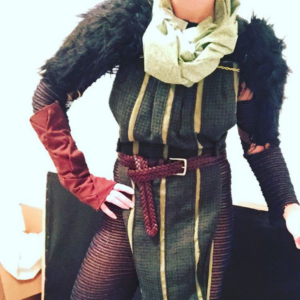
Since Merrill doesn’t wear actual shoes and most places in modern society require them, I brought brown sandals around with me for the first con. I did discover an amazing technique for invisible shoes that require clear, gel insoles. I can’t wait to make these because that is going to take this outfit to the next level.
Under(armor)wear
I first started an actual chainmail bodysuit. But then after making one sleeve, I realized that this was never going to be video game skin-tight like it is on Merrill. So I traced myself out on some shiny fishnet fabric and called it a day. Okay, there was a bit more to it than that. I did start by tracing myself though. I used this pattern for the main aspect of the bodysuit. After attaching two pieces together, I added the sleeves in a raglan sleeve format. Since the fishnet was stretchy, I didn’t need to have the bodysuit fasten. However, for the future I am attaching a zipper that goes up one leg. Since it was the most under layer, it was very tricky to run to the restroom. I had to take everything off. And I mean everything.
I already bought the zipper. Its installation is happening. I’m very excited.
Accessories
Scarves and Belts
Okay, so this one was the easiest part. For the scarf, I found the fabric I wanted and just sewed an infinity scarf because I also wanted it to also be a bit of a hood in case it rained. I really didn’t want to deal with a rainy, wet wig. Also, the way the scarf collects around my neck created a pocket. When I discovered that I couldn’t contain myself. Merrill needed a pocket.
For the belt, I found a woven, oversized belt, and then sculpted the buckle and end pieces that Merrill’s belt has. I used gold Sculpy because it was easy to cure and easy to clean up.
For the potion, I bought a bottle and filled it with blue stuff. That stuff might have been vodka. It might have been Powerade. You don’t know. My friend from Singapore actually left a beautiful wine bottle topper at my house and I use that for the cap. It has blue glass curves and I personally think it adds a rather magical touch to the lyrium.
The Selfie Staff
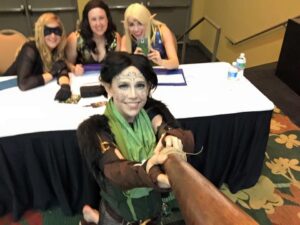
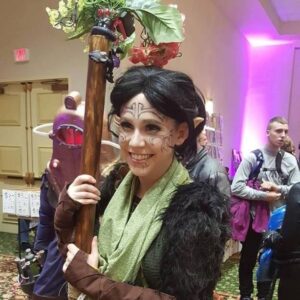
I bought pvc and scuffed it up with a file and sand paper. Then I painted it brown with acrylic paint. The acrylic doesn’t actually take well so it ends up running and causing a wood grain effect which is perfect! After doing this, you will have to coat it in mod podge because the paint will chip otherwise.
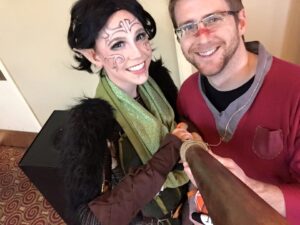
After this, I drilled a hole in the staff and tossed a selfie stick in there so the button was available from the outside. I covered up the top part of the selfie stick with flowers and such.
Bam.
Selfie Staff.
Not only was this a kind of fun way to take Con pictures with others, but it was a fun way to give your phone a cosplay too. Also, you’ll get loads of comments and people wanting to be in pictures with you. Or you could walk around with your phone in your staff and playing your own theme music. Your choice.
Putting it Together
The contacts I used were from Pinky Paradise and I completely suggest them. They were very comfortable and pretty adorable. I had never worn contacts before this costume and after a few minutes, I completely forgot I was wearing them. I did still have to get used to looking through circle lenses though (seeing lights for a minute or so after you first put them in).
I used a black, chin length wig and styled it by adding the small ponytails in the pattern Merrill has. I plan on adding the gold rings over the elastics later.
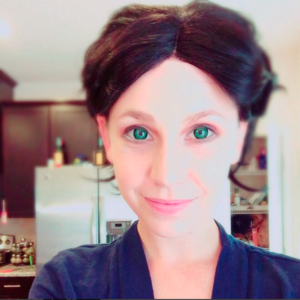
I started practicing the Vallasin with liquid liner. I found that it was better to set it with a black eyeshadow with an angled brush. I usually diffuse the pattern outward and then go through the inside with a white color to add a crisper line. (In the future, I’m just going to buy some of that skin transfer paper and save about 30 minutes of getting ready time). I also contour my face to have more of a “heart-shape” and change my eyebrows to be thinner and more arched. I try to the best of my abilities, but there’s only so much you can do with a wide nose in cosplaying.
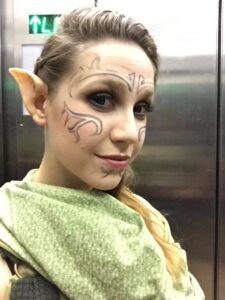
For the ears, I bought the Moon Elf ears by Aradani Studios. I picked that shape of ears because it most closely resembled Merrill’s ears and also, from the front, they looked creepily natural on me (I have weird ears to begin with). I purchased the uncolored ones by accident, but it ended up being the most awesome accident. I colored them with some theater makeup I had because theatre makeup generally won’t break down the latex (it’s made to go over latex prosthetics). After that initial layer, I used powders to help shade the appropriate places and added a bit of blush and bronzer to the very top of the ear (where sunlight hits). When I applied them, I used spirit gum in three places: the two places on the helix that are specified by Aradani and the fossa. I feel that adding spirit gum to the fossa gave the ears a more natural shape. After letting the spirit gum dry I added liquid latex over the edges and after two or three coats, the edges blended in perfectly. They were comfortable and stayed in place for an entire day. People thought that they were real so I would definitely suggest a pair if you ever want to be a fairy or an elf or just want to have fancy ears. (The only thing that is a little weird is the sound that they make when the end bumps into something. It sounds like the rustling of a garbage bag right behind you. It isn’t too annoying, but if you startle easily it’s something to get used to.)
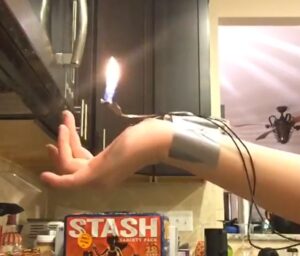
As an additional prop, I decided I wanted to be an actual spell caster. Naturally, I needed to be able to conjure fire at a flick of my wrist. I did this by taking apart a lighter, rearranging it, and applying a button ignition. It’s pretty easy, but I do need to redo it so the gas line doesn’t deteriorate from doing my parlor trick too many times.
Final Thoughts
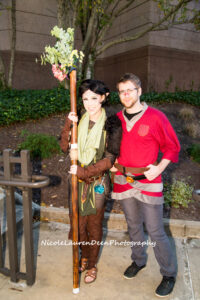
I loved making this cosplay. I loved being Merrill. I loved little girls thinking that I’m an actual elf. I loved making my boyfriend dress as Hawke and having people take our picture. I have worn this costume at two conventions already and actually won first place in a costume contest. Of course, I still have a way to go in learning and building and redoing certain aspects but this has been a blast and I’m officially hooked on cosplaying.
Products Used:
Nomad Elf Ears

